In this post I will show how to construct an Arduino automatic street light dimmer circuit, which can reduce its brightness when no vehicle is passing in the road to save power.
By
Overview
We will be exploring the methodology of sensing the vehicle or human being without false detection which may occur due to animals and also the protocol for dimming light without wasting energy.
Street lights help the vehicles to guide along the road, but during late night hours, most of the roads will be empty and still all the street lights illuminate till morning.
Due to the illumination of street lights all night even when the road is empty, it is not worth to light the street lamps and the cost due to energy consumption directly affect the local government.
To overcome this issue in smart way, we can reduce the brightness of the street lamps to desire level and only illuminate in full brightness when vehicles or human being pass by.
This may help the government to reduce expenditure on power and also save lot of energy which could be used for other energy demanding purposes.
The proposed idea to detect activity on the road, utilizes ultrasonic sensor which can measure the distance between the sensor and the obstacle, in this case the obstacles are vehicles or human beings.
When a vehicle comes into the range of the sensor, it does some mathematical calculations to determine the distance between the vehicles and sensor, if the vehicle is confirmed to be below the pre-determined range; the on-board microcontroller will light the street lamp at maximum brightness.
The street light will illuminate at maximum brightness for a pre-determined amount of time and reduce its brightness if no vehicles or human beings are detected further.
By now the objective of this project would have cleared. Let’s dive into circuitry of the proposed setup.
Circuit Operation

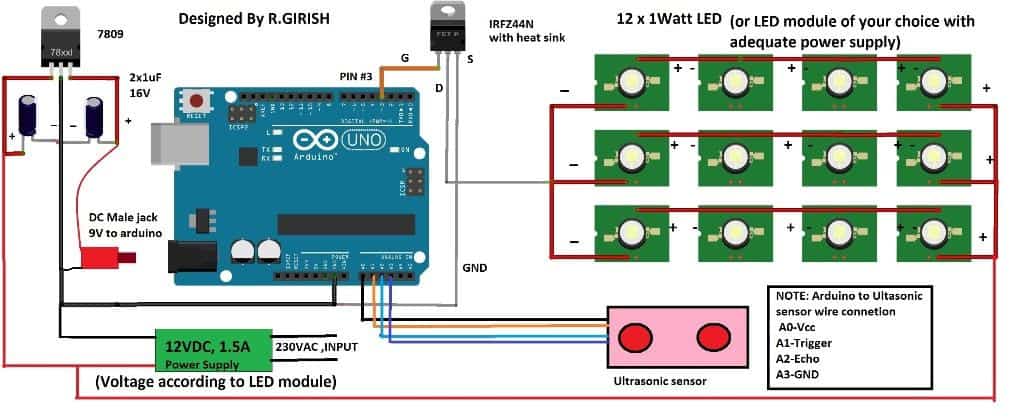
The automatic street light dimmer circuit consist of Arduino which is the brain of the project, an ultrasonic sensor for detecting vehicles or human beings. A 9V regulator is provided for powering the arduino microcontroller board and a MOSFET for driving the LEDs which consumes few amperes at peak brightness.
The LED module and power supply for the setup must be selected carefully so that there will be adequate power available for the whole circuit and does not overload the power supply.
The LED module can be homemade one which is shown in schematic or may be purchased for market, but before constructing or getting one form market make sure to calculate the voltage and current requirements for the power supply.
The power supply may be an SMPS or constructed using transformer, rectifier and voltage regulator.
The LED reduces its brightness by using PWM. The PWM is square wave, it turns on and off supply to LED rapidly with well determined on and off width in a single cycle. The width of the on and off time determine the brightness of the LED.
When the street light switches to full brightness the supply to LED will have no pulses and steady DC will be supplied.
The whole setup can be implemented as shown below:
Setup Diagram
 -
-
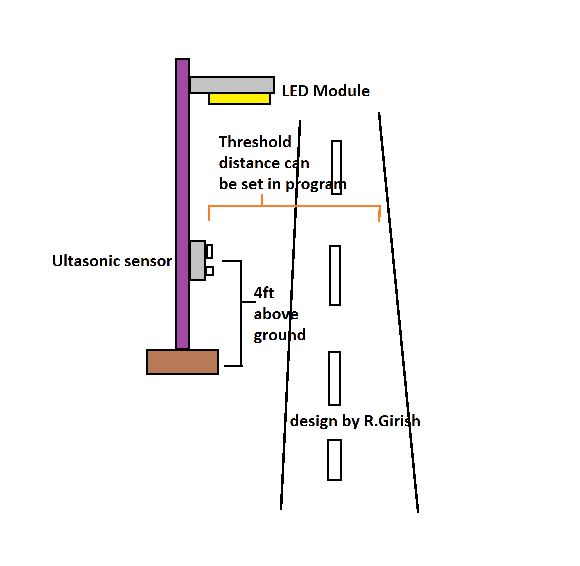
The ultrasonic sensor is elevated around 3.5ft to 4ft above the ground; this is done so that it only detects vehicles and human beings, since their average height is around the same and when dogs or cats or any other animals which usually roam around the city will not trigger the street light to maximum brightness.
The animals which live and roam around the city are below 3.5ft tall.
The sensor height may be adjusted to operate at optimum level as described in the above picture.
The threshold distance can be controlled in the program.
When the Arduino detects the obstacle detected below pre-determined distance the LED lights go peak brightness.
Program Code:
//--------------------Program developed by R.Girish-------------------//

const int trigger = A1;

const int echo = A2;

int vcc = A0;

int gnd = A3;

int LED = 3;

long Time;

float distanceCM;

float distanceM;

float distance = 100; // set threshold distance in cm

int dim = 28; // adjust minimum brightness

int bright = 255; // adjust maximum brightness

float resultCM;

float resultM;

void setup()

{

pinMode(LED,OUTPUT);

pinMode(trigger,OUTPUT);

pinMode(echo,INPUT);

pinMode(vcc,OUTPUT);

pinMode(gnd,OUTPUT);

Serial.begin(9600);

}

void loop()

{

digitalWrite(vcc,HIGH);

digitalWrite(gnd,LOW);

digitalWrite(trigger,LOW);

delay(1);

digitalWrite(trigger,HIGH);

delayMicroseconds(10);

digitalWrite(trigger,LOW);

Time=pulseIn(echo,HIGH);

distanceCM=Time*0.034;

resultCM=distanceCM/2;

resultM=resultCM/100;

Serial.print("Distance in cm: ");

Serial.println(resultCM);

Serial.print("Distance in meter: ");

Serial.println(resultM);

Serial.println("------------------------------------------");

if(resultCM<=distance)

{

analogWrite(LED, bright);

delay(10000);

}

if(resultCM>=distance)

{

analogWrite(LED,dim);

}

delay(100);

}

//-----------------Program developed by R.Girish-------------------//
NOTE:
• The threshold distance can be adjusted by replacing the Value with your own.
float distance = 100; // set threshold distance in cm
The value must be entered in centimetre; the maximum value can be 400 to 500 cm or 4 to 5 meter.
• The dimming of the light can be adjusted by using
int dim = 28; // adjust minimum brightness
255 is maximum brightness 0 is lights off.
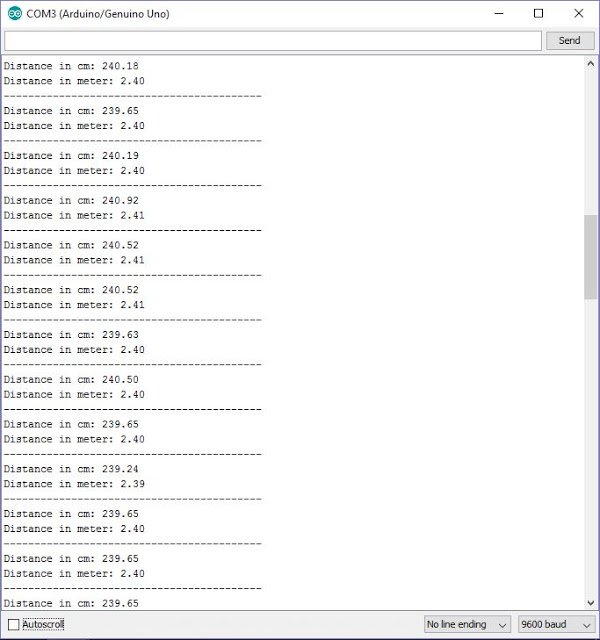
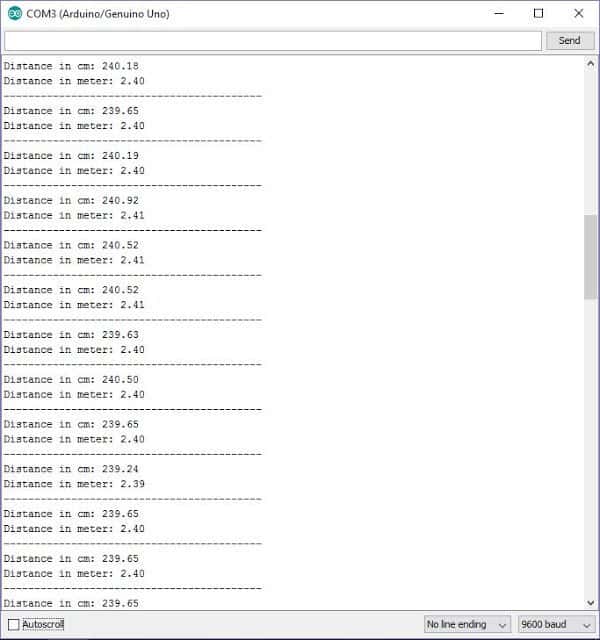
We can also witness the distance between the sensor and the obstacle in serial monitor.
If you have any further questions regarding this Arduino based automatic street light dimmer circuit feel free to ask in comment section.


With over 50,000 comments answered so far, this is the only electronics website dedicated to solving all your circuit-related problems. If you’re stuck on a circuit, please leave your question in the comment box, and I will try to solve it ASAP!